
Step 4: DIY Branding Part III – Putting Your Blog Header Together
 In part I of this series of articles on how anyone can create their own blog header, I showed how to find the perfect image for your header. Part II went through picking a great looking font and installing it on your computer. Now I’ll show you how to put the image and font/text together.
Creating Your Own DIY Blog Header: Putting The Image and Text Together
To put the image and font together I’m going to use PowerPoint. The same steps can be done in Word but it’ll be trickier getting your blog’s name in the right place on the image – not impossible, just a little harder.
So, open up PowerPoint and create a new presentation.
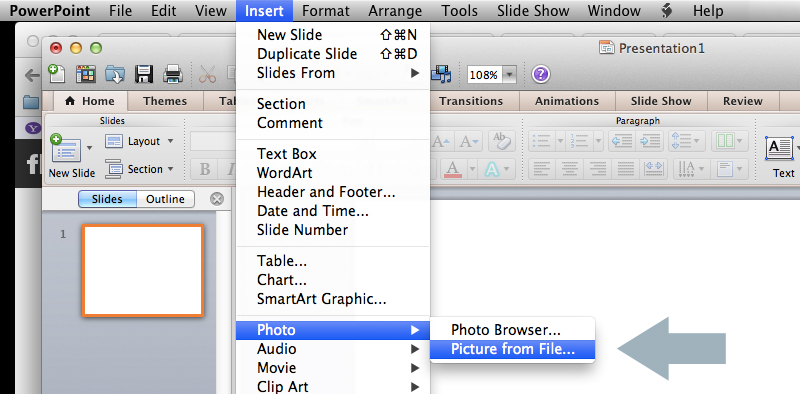
Click on “Insert” in the menu bar, then go down to “Photo” and click on “Picture from File”
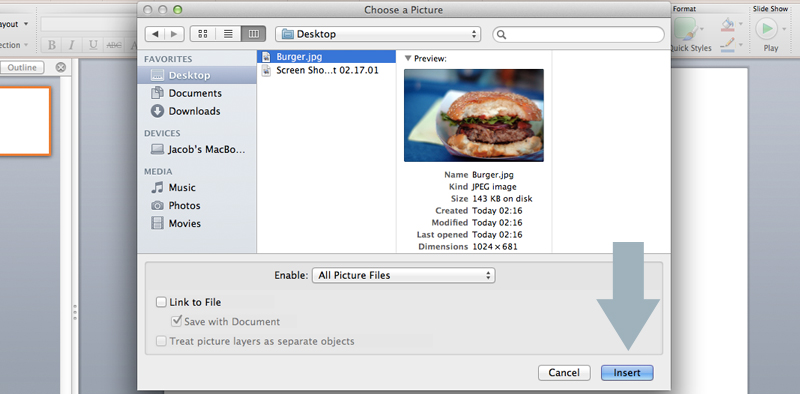
Select the image you want to use then click on “Insert”.
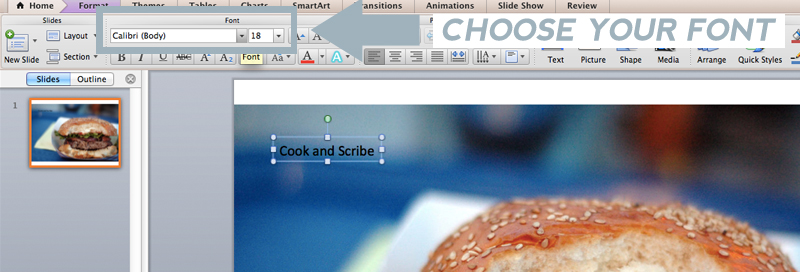
Now we need to insert the name of your blog. Under the “Home” menu tab click on the “Text” button.
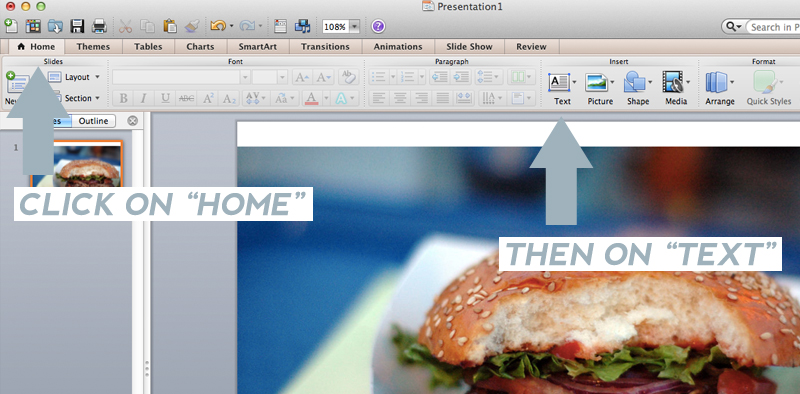
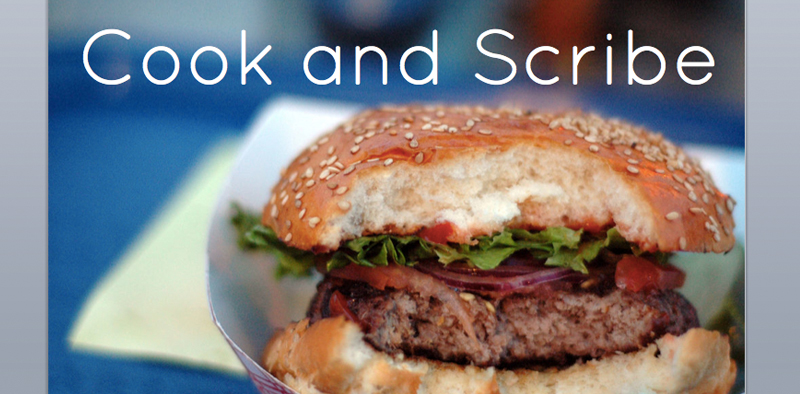
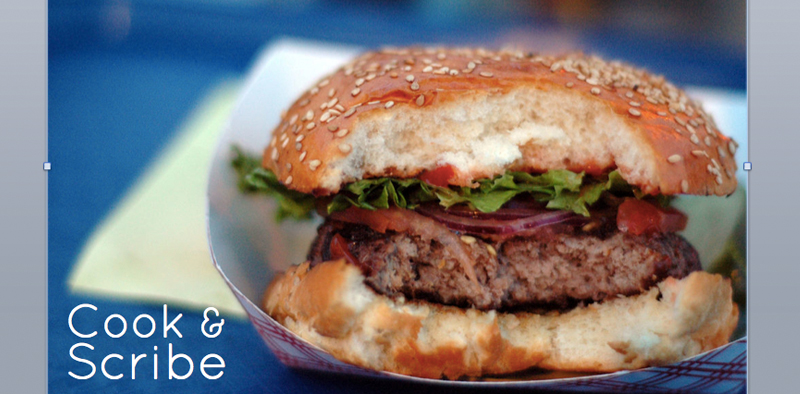
Click somewhere on your picture that has some free space, and you can write our your blog’s name.
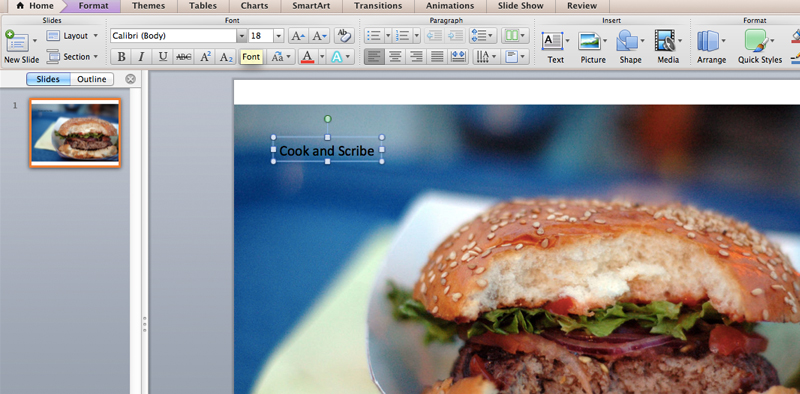
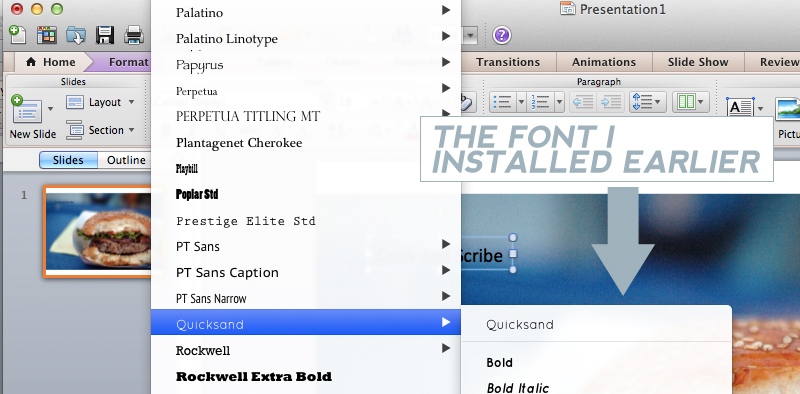
Now go to “Font” and find the font that you installed earlier.
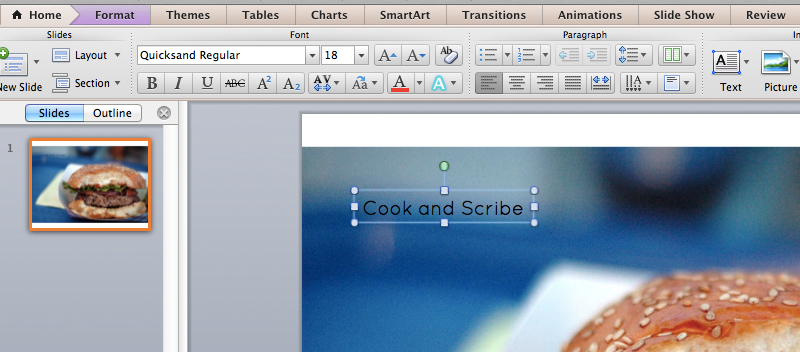
It’s starting to look good. For my image and text combination, I’m going to need a different font color to make the text stand out. If you have a white background, then black text works well. For my image I’m going with white text.


Now start playing around with different font sizes, and placing the text in different locations on the image.
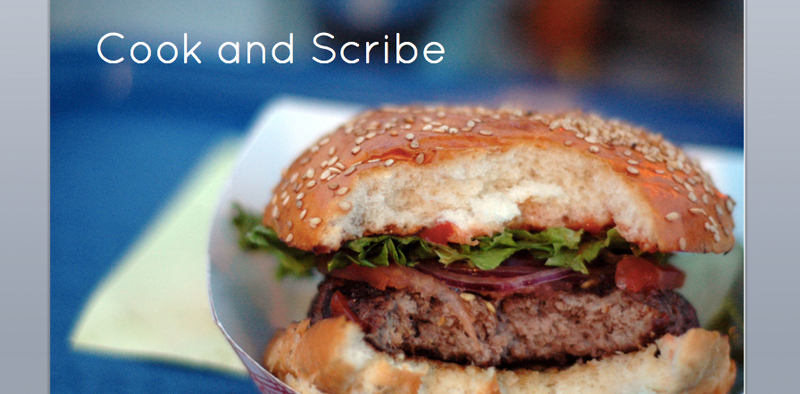
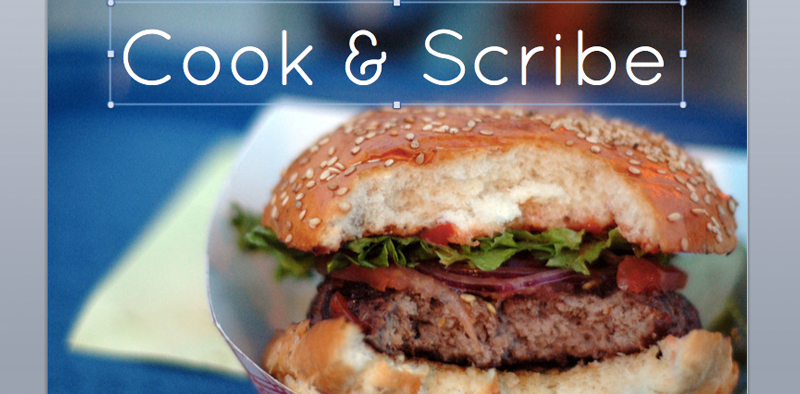
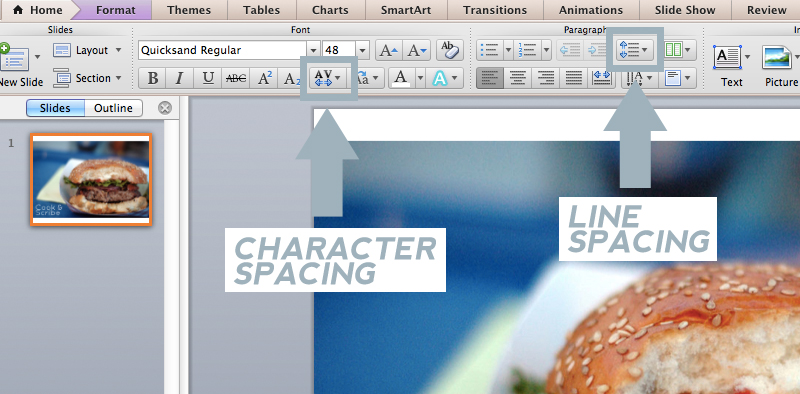
If you have the same version of PowerPoint as I do you can also play around with the Character Spacing and Line Spacing
Before
After
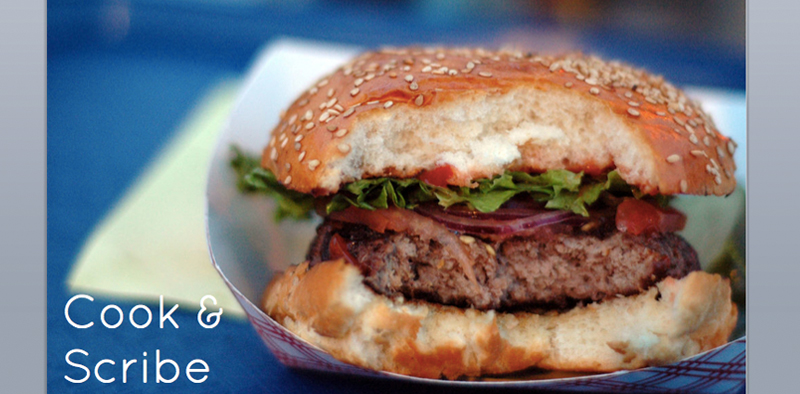
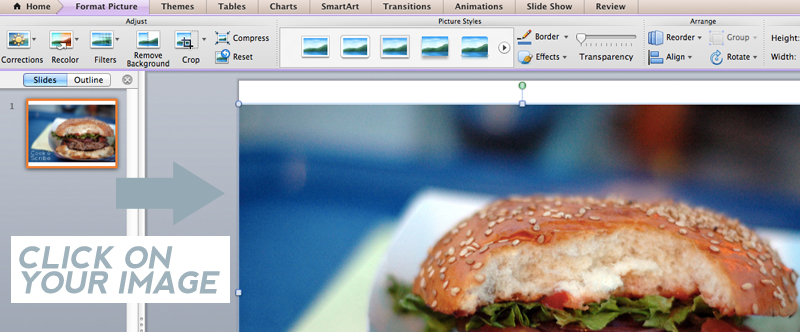
Now since my image is a little bit too tall for a header I’m going to crop it. To do this I click on the image, and click on “Format Picture” in the menu bar.
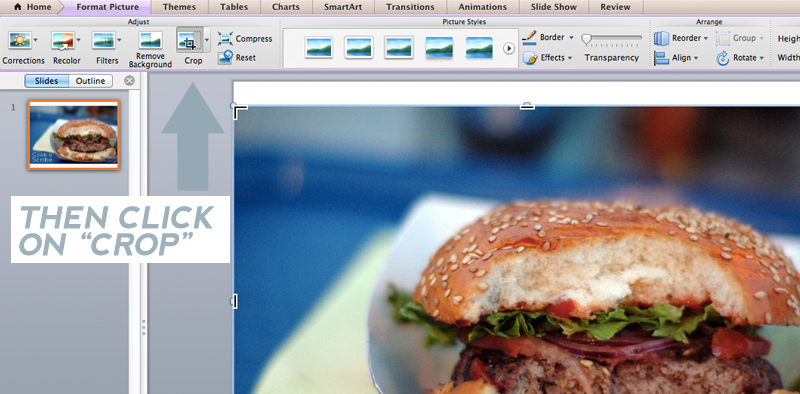
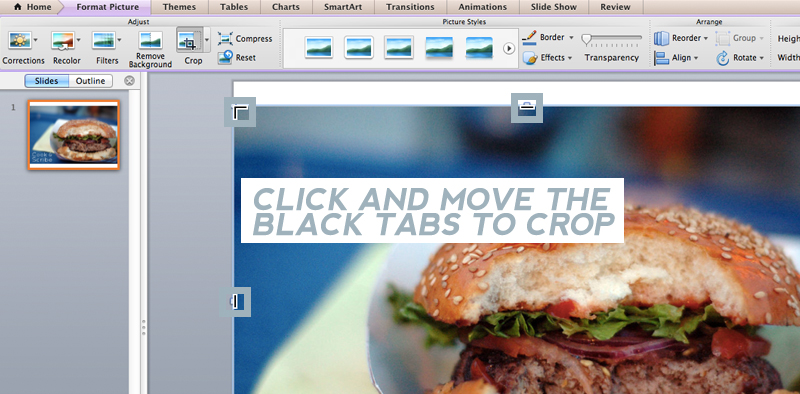
Then click on the “Crop” button. Now I can click and drag the edges of the picture to make it the right size.
Before

After

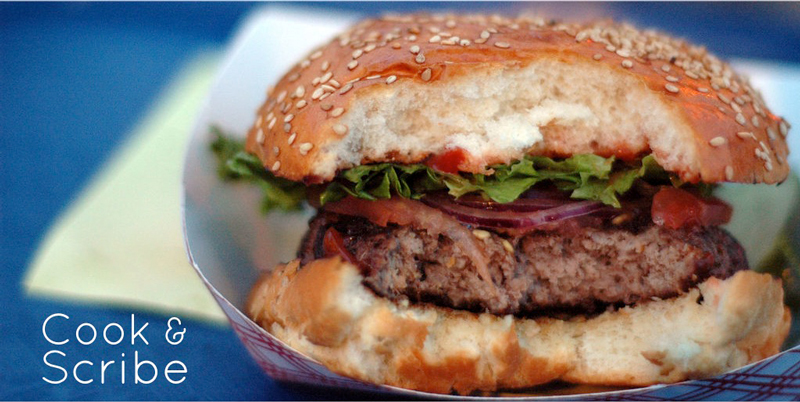
Looking good..
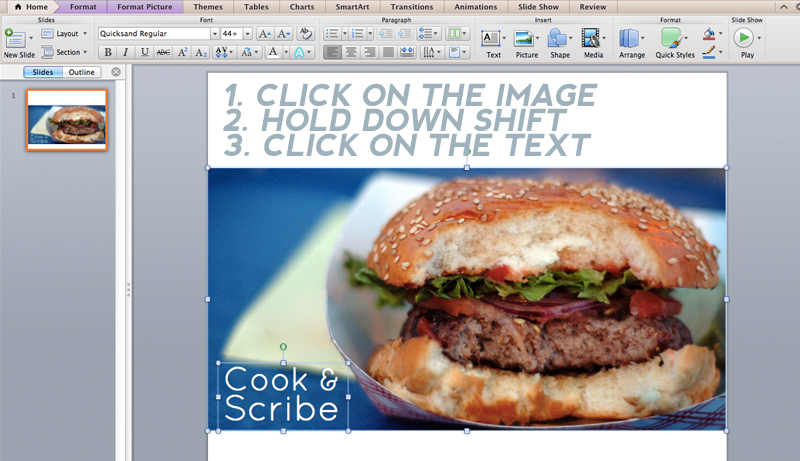
Now all I need to do is save it and upload it to my blog. To do this you need to select both the image and the text. Do this by clicking on the image, then while holding down the shift key click on the text as well.
Now right click somewhere on the image and click on “Save as Picture”
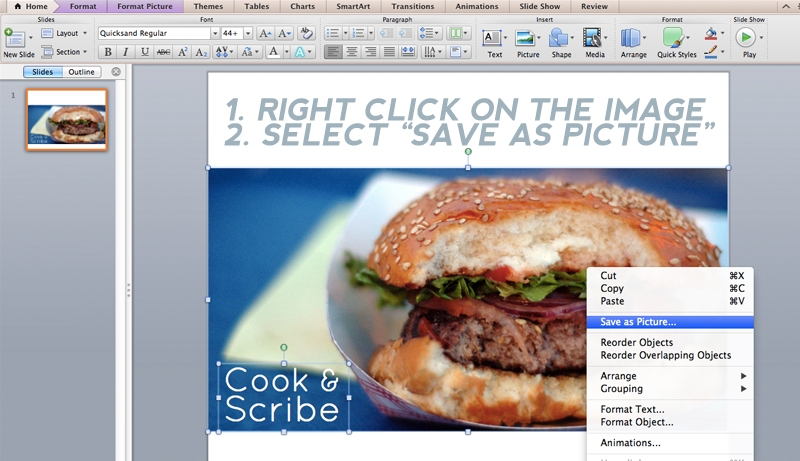
Type in the name you want to save the image as. Under “Format” select “JPEG”, then click save.
And there you have it, a free blog header you made yourself. There is just one more step, and that is to get it up onto your blog….

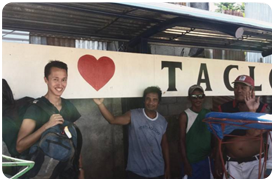 (A photo of me leaving the Philippines, after Volunteering there for a year and half. While my home design blog was still running.)