
DIY Set Up: How to Start a Food Blog (11 Minutes)
![]()
Pin this for later, or get started now
 In this post I will show you how to start a food blog by getting your domain name, walking you through the best place to start a blog, and then how to set up WordPress on your brand new site.
If you haven’t got a name yet, you can check out my guide here for creative ways of coming up with one.
The 2 Parts of Setting Up a Food Blog
- First there is the domain name. This is your address on the web (www.myfancyfoodwebsite.com)
- Then there is your hosting account. This is a place, like a hard drive, where you store your website. Every time someone visits your site, the host sends them the files (text, pictures, etc.) so they can see your website on their computer.
11 Minutes and $3.95
It’s quite easy to set both of these things up. It will only take around 7-11 minutes. When it comes to costs, a domain name is usually under $10 per year. But you’ll be able to get a free domain the way I’ll show you how to set up your blog (it comes free with your hosting account). The hosting account, the place that stores your blog, will cost $3.95 – $6.95 a month.
The Importance of Having Your Own Site
It is very important to have your own domain and hosting account. You can host a free blog directly on WordPress and your domain/blog name will be something like www.hatchandscribe.wordrpess.com. The down sides of doing it that way are:
- You don’t own your blog, so if anything happens to the free blogging site, you can lose everything
- It doesn’t look professional
- There are restrictions on what you can and can’t do (the look of the site is restricted, you can’t put up advertising and make money from your blog, etc.)
So if really want to create your own successful blog, your own space on the web, then it is important to have a personal domain name and hosting account.
Next I am going to show you how to register your domain name and set up your blog on a hosting account.
If you get stuck at any point, please just send me a message on the contact form and I’ll help you out ASAP.Creating Your Food Blog’s Hosting Account
The hosting company we are going to use to set up your blog is BlueHost. It is the same hosting company that hosts Hatch and Scribe – and it is the best place to create a food blog.
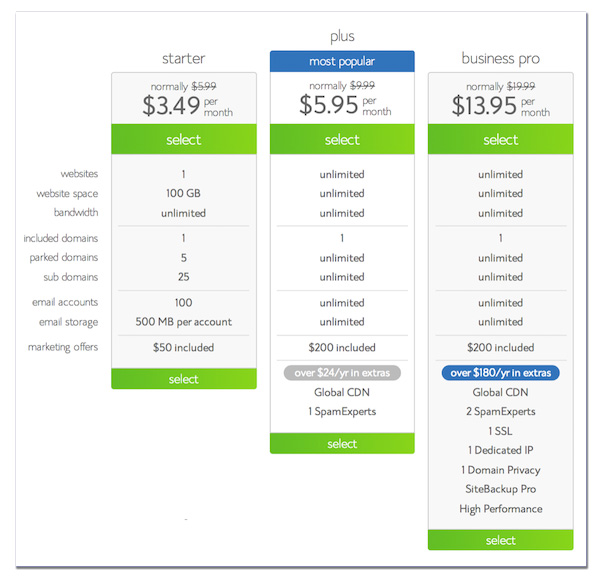
You can get a hosting account with BlueHost for only $5.95 a month for a 12 month plan, and $3.95 a month for a 36 month plan. This is all paid in a lump sum to save you money. But with one of these BlueHost hosting accounts you will get a free domain name.
So if you haven’t done so, click here and you’ll be sent to the BlueHost website. To create your hosting account click on the “starter plan”:
On the next page type in your food blog name in the “new domain” box and click “Next”.
On the next page you’ll need to put in your account information.
When it comes to the account plan, the longer you sign up for the cheaper it is. You have a choice of 36 months at $3.95 a month. Or 12 months at $5.95. This is paid in a lump sum to save you money. So the 36 month plan will cost $142 and the 12 month plan will cost $71.40. If you are just starting out with a new blog, I would recommend going with the lower cost option, the 12 month plan. After 12 months you’ll know if you want to continue your blog, and you can get the longer plan.

I use BlueHost for Hatch and Scribe and my home design blog Home Tree Atlas – Bonus: you get a free domain name with them. Start your own food blog with the Starter Plan for only $3.95 a month.
And you are done! You have just set up your own domain name and hosting account. Congrats! There is only one more step to becoming a food blogging pro.
Time for a breather…
There is one more thing you need to do, and that is to click on one button (just one button) and a whole blogging site is set up on your domain. Exciting stuff…
This one button we are going to press together, will install WordPress onto your domain. 90%+ of bloggers use WordPress to power their blogs. Once you have it on your site, all you have to do is log in and start writing. It manages your blog posts, your comments, everything. You can choose different themes or use crazy plug-ins like showing your tweets or Pinterest pins on your blog. You don’t need any special programming skills to use it – it is all pretty straightforward and easy to learn.
How to Install WordPress
To get started installing WordPress onto your site you’ll need to be logged into your BlueHost account.
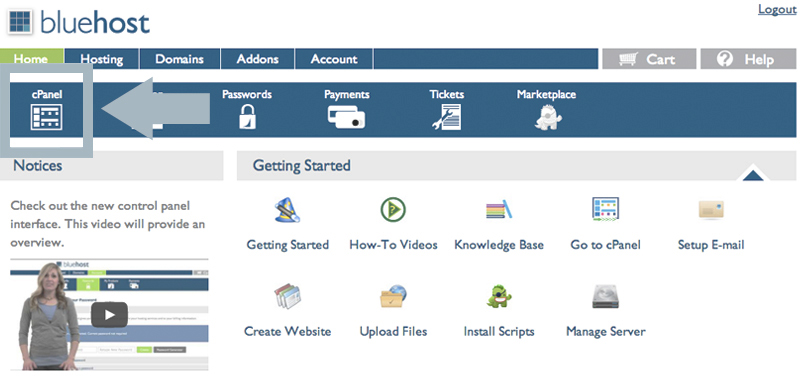
If you are not already there, you want to go to your CPanel
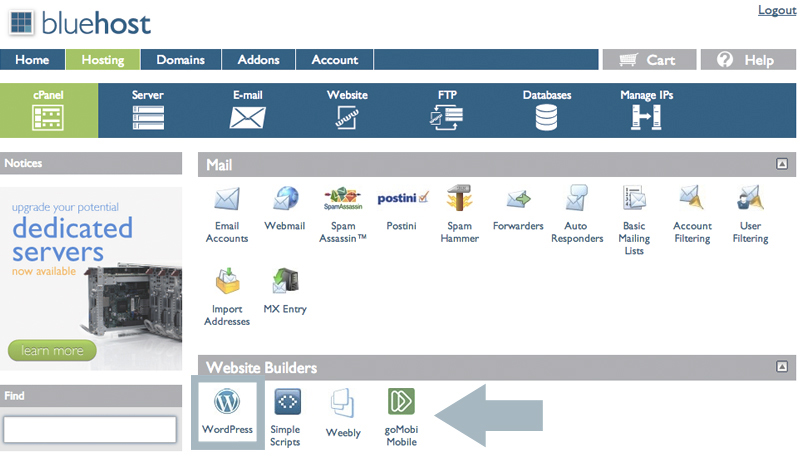
Under “Website Builders” click on WordPress
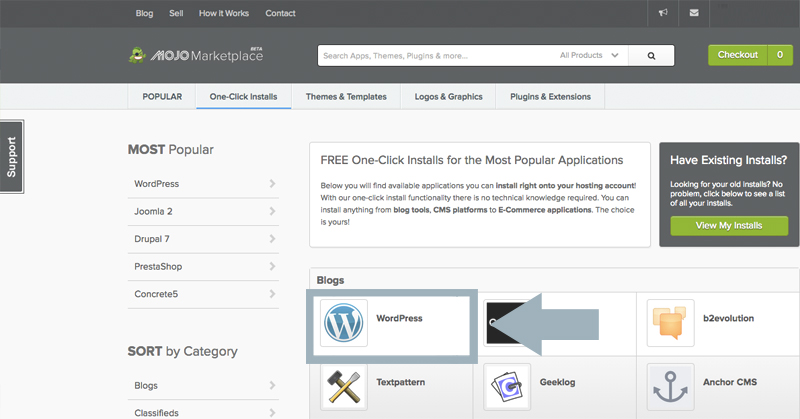
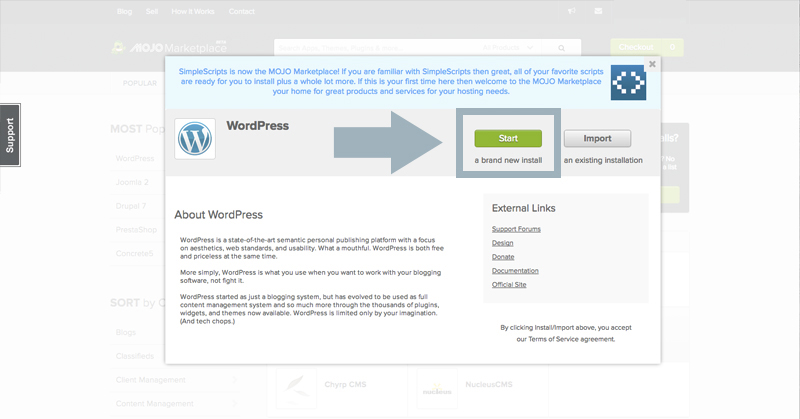
Click on the WordPress logo and a pop up comes up – click the green start button
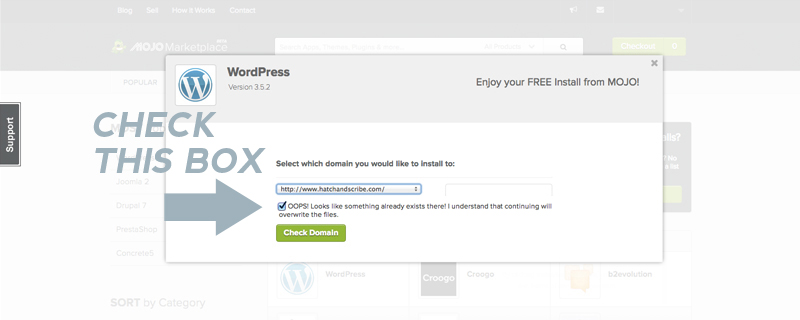
Select your domain name and click on the green “Check Domain” button. If a warning comes up asking if you want to “Overwrite” say yes.
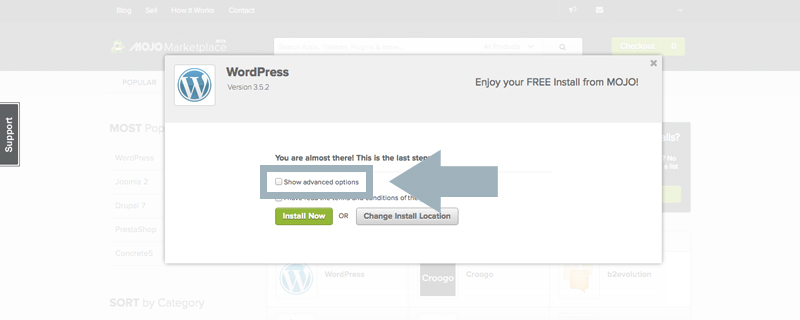
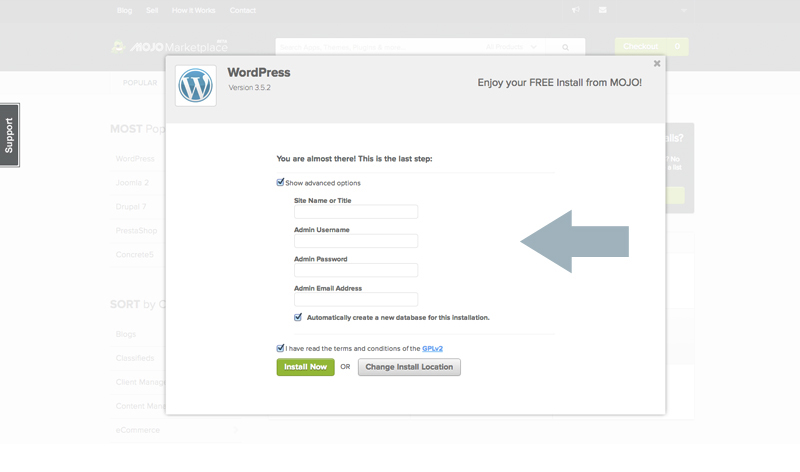
Once that is done you’ll be taken to the next section. Click on “advanced options”. Here you want to enter your blog details: the blog name, the sign in username and password (remember these to log in later). And select the “Automatically create a new database for this installation” box.
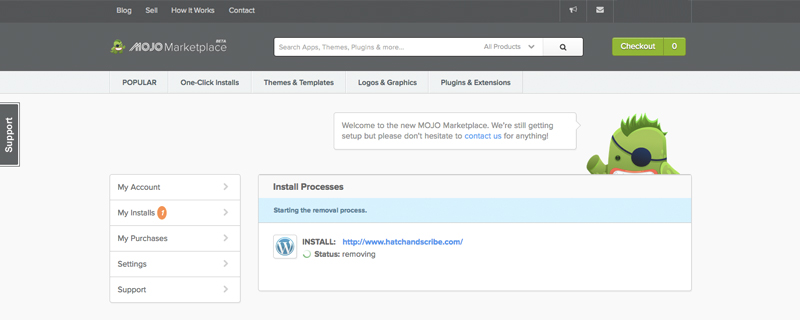
Now WordPress is being installed on your domain.
Now type in your awesome new domain name into your web browser and see your website live!

Next up: I am going to walk you through the basics of WordPress and get you to write your first blog post Introduction to WordPress Guide – Writing Your First Blog Post.
 (A photo of me leaving the Philippines, after Volunteering there for a year and half. While my home design blog was still running.)